..step by step
After weeks of CAD design, construction work finally begun in February 2024!

The Astronomical Observatory will be built right here!
First of all, let's mark out the area where the Observatory will be. I still remember the emotion! It is located in the land in front of our country house, at a distance of just 100 meters among olive trees, various fruit trees and a vineyard. All around only nature and a beautiful little forest.

Now let's take the cables to the Observatory.
We marked out the line where to dig for the 100m passage of pipes to run the cables from the country house to the Observatory. These cables will allow the Observatory to be powered and connected. We pulled this line manually using a large roll and this was the first real physical work, effectively starting the construction !

Here is the canal for the corrugated pipes.
The path is deep enough to ensure maximum protection of the cables and is made using a small excavator. Great care was taken not to damage the adjacent vineyard.

Inspection pits always useful
Every 20 meters we placed an inspection pit that allows access to the corrugated pipes and cables at different points of the route, if necessary. We then blocked the corrugated pipes with aluminum sponges to prevent the entry of field mice.

3 pipes under the vineyard!
We buried 3 corrugated cables: 1 for the 230v power supply, 1 for the cat7 LAN data line and 1 for the drinking water supply. This separation eliminates the risk of magnetic interference that could negatively impact the data line. The picture is taken from the arrival side (Observatory area).

Digging to place the foundations
Here we were excavating the area where the reinforced concrete platform will be placed. We used a small excavator because the amount of soil to remove was huge. The same was also used to dig the canal to position the corrugated pipes with the cables coming from the country house.

Here we will place the plinth
We dig further to make the hole for the reinforced concrete plinth of 40x40x120 cm. The hole, as you can see in the photo, is about 90 cm deep from the base of the platform, so, considering the thickness of the latter, the column is 120 cm deep overall. What a solid structure!

The armor for the platform!
Solid iron framework for the platform in reinforced concrete. This iron structure was also used for the construction of the side platform for the Dobsonian big telescope. Due to the huge weight, we moved these grates with the tractor.

Here's the armor for the plinth!
Solid iron framework realized for the plinth in reinforced concrete. It really looks like a backbone!

Before the concrete pouring!
Positioning of the lateral supports before pouring the concrete. These were fixed together @ 90° angles to ensure a precise rectangular shape. The concrete was made with a small concrete mixer and poured manually with buckets.

Building the plinth!
First of all we started to build the plinth, a crucial step of the entire construction flow. This represents the most important structural element because the steel column, on which the main telescope will rest, will be anchored on it.

Don't forget the corrugated pipes!
Before pouring the concrete we passed the corrugated pipes that reach various points of the observatory. In this image you can see the one that leads to the central column.

Plinth design.
The plinth has a larger recangular base buried under the platform, in order to ensure maximum stability. The figure shows the side section view. There is no any contact point between plinth and platform, an minimm distance is 1,5cm. Plinth total lenght is around 120cm.

Building the reinforced platform
Once the plinth had solidified we built the platform. The reinforced concrete platform does not touch the plinth, which therefore remains a separate structure and is therefore free from vibrations. This was possible by first building the plinth and then pouring the concrete for the platform, leaving a minimum space of about 1.5 cm between the two for the entire surface.

Here is the newly constructed platform and central plinth
The platform is perfectly level and a series of corrugated pipes were immersed in the concrete to carry the various cables to the various areas of the Observatory, avoiding exposed passages. Leveling cement has already been applied here to obtain a surface that is as smooth and uniform as possible with very limited dust generation.

The concrete is finally ready !
The concrete has set and the platform and plinth are ready for use now. It's really impressive and solid, isn't it? Now we are ready for an earthquake!

The front base in natural stones construction started.
We made a large base of natural stones on the front and on the outer perimeter of the concrete platform. It's an hard but very beautiful work, stone by stone until the entire platform is completed. We wanted to limit the use of concrete in such a bucolic setting, and natural stones were perfect for the scope.

The natural stone base is finally completed
We made it ! We will use this area sometimes as a refreshment point and meeting point with loved ones. This platform also reduces the gap between the Observatory entrance and the sloping ground in front.

Perimeter wall
We then built a small perimeter side-back wall in natural stones to support the surrounding terrain. It's needed due to the sloping ground.

Astronomical Shelter
It's time to assemble the Astronomical Roll-Off Shelter on the reinforced concrete platform. The supplier came with 3 workers to assemble all the parts previously made in the workshop. No welding on site, all metal surfaces were pre-treated and bolted on site to avoid any risk of rust over time.

Concrete block pavement and small stone staircase
It is now time to make a concrete block floor at ground level. This will be useful, for example, to place a star tracker when the observatory is in operation and therefore when the removed roof covers the sky above the natural stone platform. A small stone staircase has also been made to easily climb onto the natural stone base from which to access the observatory.

Roof electric motor
The roof is moved by a powerful 190W electric motor supported by a sturdy steel truss bolted onto threaded bars anchored to the concrete platform. This system ensures a constant grip of the pinion keyed to the engine axis on the rack fixed to the roof.

So many cables !
Now we needed to pass the cables through the corrugated pipes to reach the inside of the observatory. The cables come from the country house but also from the perimeter areas of the observatory where the vertical pipes, that support the control cameras, the weather station and the All SKY camera, are located. Then there are the cables that go to the steel column to make the Telescope working.

Electrical system
It's time to make a proper electrical system. There are two internal lights, 3 Schuko electrical sockets and two LAN sockets. Some cables pass through corrugated pipes on the internal wall surfaces going through various junction boxes.

Wheater station, cameras and lights
Now we need to install the weather station, All Sky camera, indoor (1) /outdoor (2) control cameras, indoor (2) / outdoor (4) lights, and 2 external motion detectors. On top of all this, there is also the alarm system.

Limit switches (open/close)
The installation of two limit switches for safe roof control is of fundamental importance. to prevent it from closing when the telescope is not in the parking position.

Let's paint the Observatory now!
To ensure the best visual integration into the rural environment, the Observatory was painted brown. Perhaps not the best color to limit the heating of the box due to solar radiation, but the human eye must also be satisfied. In any case, both electrical panels are equipped with a cooling fan. The perimetral panels were painted only on the outside, while the metal parts were painted both inside and outside.

The steel column
The 4mm thick steel column is bolted to eight 16mm threaded rods anchored to the concrete base. The column is hot-dip galvanized and sand-painted in matt black to avoid any type of reflection. Note how the top plate of the column is oriented at approximately 15° left from the squared colums axe, to ensure a good north orientation of the mount once mounted on it.

Side platform for Dobson - first layer
Construction of the first reinforced concrete layer of the lateral platform dedicated to the trolley/rails system of the Dobson telescope. This system will allow the 100kg big GoTo Dobsonian telescope to be easily carried out of the observatory for easy and effective use.

Side platform for Dobson - second layer and third layers
Construction of the second layer in natural stones and third layer again in reinforced concrete of the lateral concrete platform dedicated to the Dobson telescope. The structure is very solid and allows for effective use of the optical instrument.

Junction box
How many cables! This box is located right under the main electrical panel and has the function of collecting the cables coming from the various corrugated pipes immersed in the concrete. Some of these come from the house and some from the 3 corner positions in the observatory and the central column.

Main electrical panel
Here is the main electrical panel only partially assembled in this image.

Main electrical panel now completed !
It was positioned on the north wall of the structure and connected at the bottom to the junction box that collects the corrugated pipes. This is the heart of the observatory and allows remote operation from anywhere in the world as well as allowing complete automation. It is a sophisticated system that includes many components, some for safety and others for the operation of all the devices present in the observatory.

Column secondary electrical panel
Starting the installation of secondary electrical panel anchored on the steel column. It was not easy at all to drill the 4mm thick steel column but we did it in the end!

Column secondary electrical panel completed !
This is the home of the mount's control box and 24v transformer, the observatory server, the hub for the various instrument wiring and of course a fan to limit the temperature inside. This box allows for easy addition of extra wiring to accommodate new devices in the setup.

The mount and the Telescope !
July 2024. Finally installed on the steel column together with the focuser, camera, filter wheel and flat panel. The system is ready to capture the "first light" from the Universe ! I was really excited. After a day of work in the summer heat, in the evening we enjoyed the fesh air while observing the marvel we had just tested.

All clean and in oder finally !
Everything is in its place, including the telescope cables collected in an elastic sheath, so as to avoid any kind of interference during the movements of the mount that follows the night sky.

Beware of field mice!
Let's protect the Observatory and it's devices & cables from the entry of little field mice! We have inserted metal sponges in all the access holes to the Observatory. The same goes for the underground pits for the inspection of the corrugated pipes. In any case, it must be said that the Observatory, although completely waterproof, is not airtight and this does not prevent the occasional entry of some cute little animal that keeps me company during the evenings of observation 🙂.

Mosaic rubber flooring
Laying of the mosaic rubber floor, I felt like an artist. It was an accurate job of cutting out each 60cmx60cm square of rubber, creating almost perfect fits. It took two days to complete the job. Some panels were also sacrificed because they were not cut with the necessary precision.

Precision and accuracy
Look how the floor follows every single shape inside the observatory leaving not even 1cm of the concrete floor uncovered. To complete this part (picture) for example we used a contour replicator ! Of course, you can only access the Observatory without shoes (Winter included), you have been warned! 🙂

The furniture has arrived!
Desk with laptop, a cabinet and small refrigerator for a fresh beer in the summer always available. The Observatory was designed to have enough space for every comfort.

The cabinet is full!
Desk with laptop, a cabinet and small refrigerator for a fresh beer in the summer always available. Look how much stuff I ended up having to put away in the cabinet. There are work tools, screwdrivers, electrical material and a series of optical instruments such as eyepieces, guide tube, Reflex, lens, etc.

Laser!
The laser was installed to prevent the roof from closing when the telescope is not in the park position. The laser is mounted on the truss that supports the motor that moves the roof. The laser points to center of the flat panel of the optical tube mounted on the column. Only when the flat panel is closed and the tube is in the parking position, the laser returns a signal able to unlock the relay of the control board that allows the roof to move. This means that if the tube is not exactly in that position, parked with the flat panel closed, the roof will not be able to move at all.

Vibration test
A test was performed to measure the amount of vibrations using very sophisticated equipment brought and operated by a dear friend. The system consists of a series of very sensitive accelerometers, of which two positioned on the lateral concrete platform as shown in the photo, and one above the column attached to it with wax. The result was great, even walking on the 2 concrete platforms, no significant vibrations will disturb the photo session. The solid reinforced concrete pillar on which the column rests, independent of the platform, does its job very well.

Go-To Dobson platform refinement
Now it is time to apply the leveling cement on the platform and fix the threaded rods that will support the rails on which the trolley, that will transport the large telescope out of the Observatory, will pass.

Rails for Go-To Dobson platform completed!
The rails have been placed. Looking carefully at the photo you will notice that there are a pair of external rails and a pair of internal rails, both fixed to their respective concrete platforms. However, in order to allow the opening and closing of the side door, the system provides for the easy manual insertion of a third pair of rails that connects to the previous ones. A system of threaded rods anchored to the external platform with a nut and counter nut allows the pair of fixed external rails to be perfectly levelled, thus enabling perfect coupling with the "moving rails". The photo also shows in the background the main optical tube on the column in the parked position.

Go-To Dobson platform, conjaction details
The internally fixed rails, on the other hand, are bolted onto threaded rods anchored in the concrete of main Observatory platform. Here you can see the millimetric connection between the fixed internal rails and the two movable rails that can be manually removed and inserted as needed. Movable rails rest directly on the internal concrete. A similar connection is also present between the movable rails and the external fixed rails. In this case both the two external fixed rails have a horizontal welded plate on which the movable rails rest and two laterally welded plates to ensure coaxiality.

The Dobson parked on the trolley!
Here you can see the large Dobsonian telescope lying on its trolley, so that it can slide freely on the rails and be easily transported outside. The trolley-rail system has been designed down to the millimetre to allow the Dobson, in folded configuration, to pass through the side door.

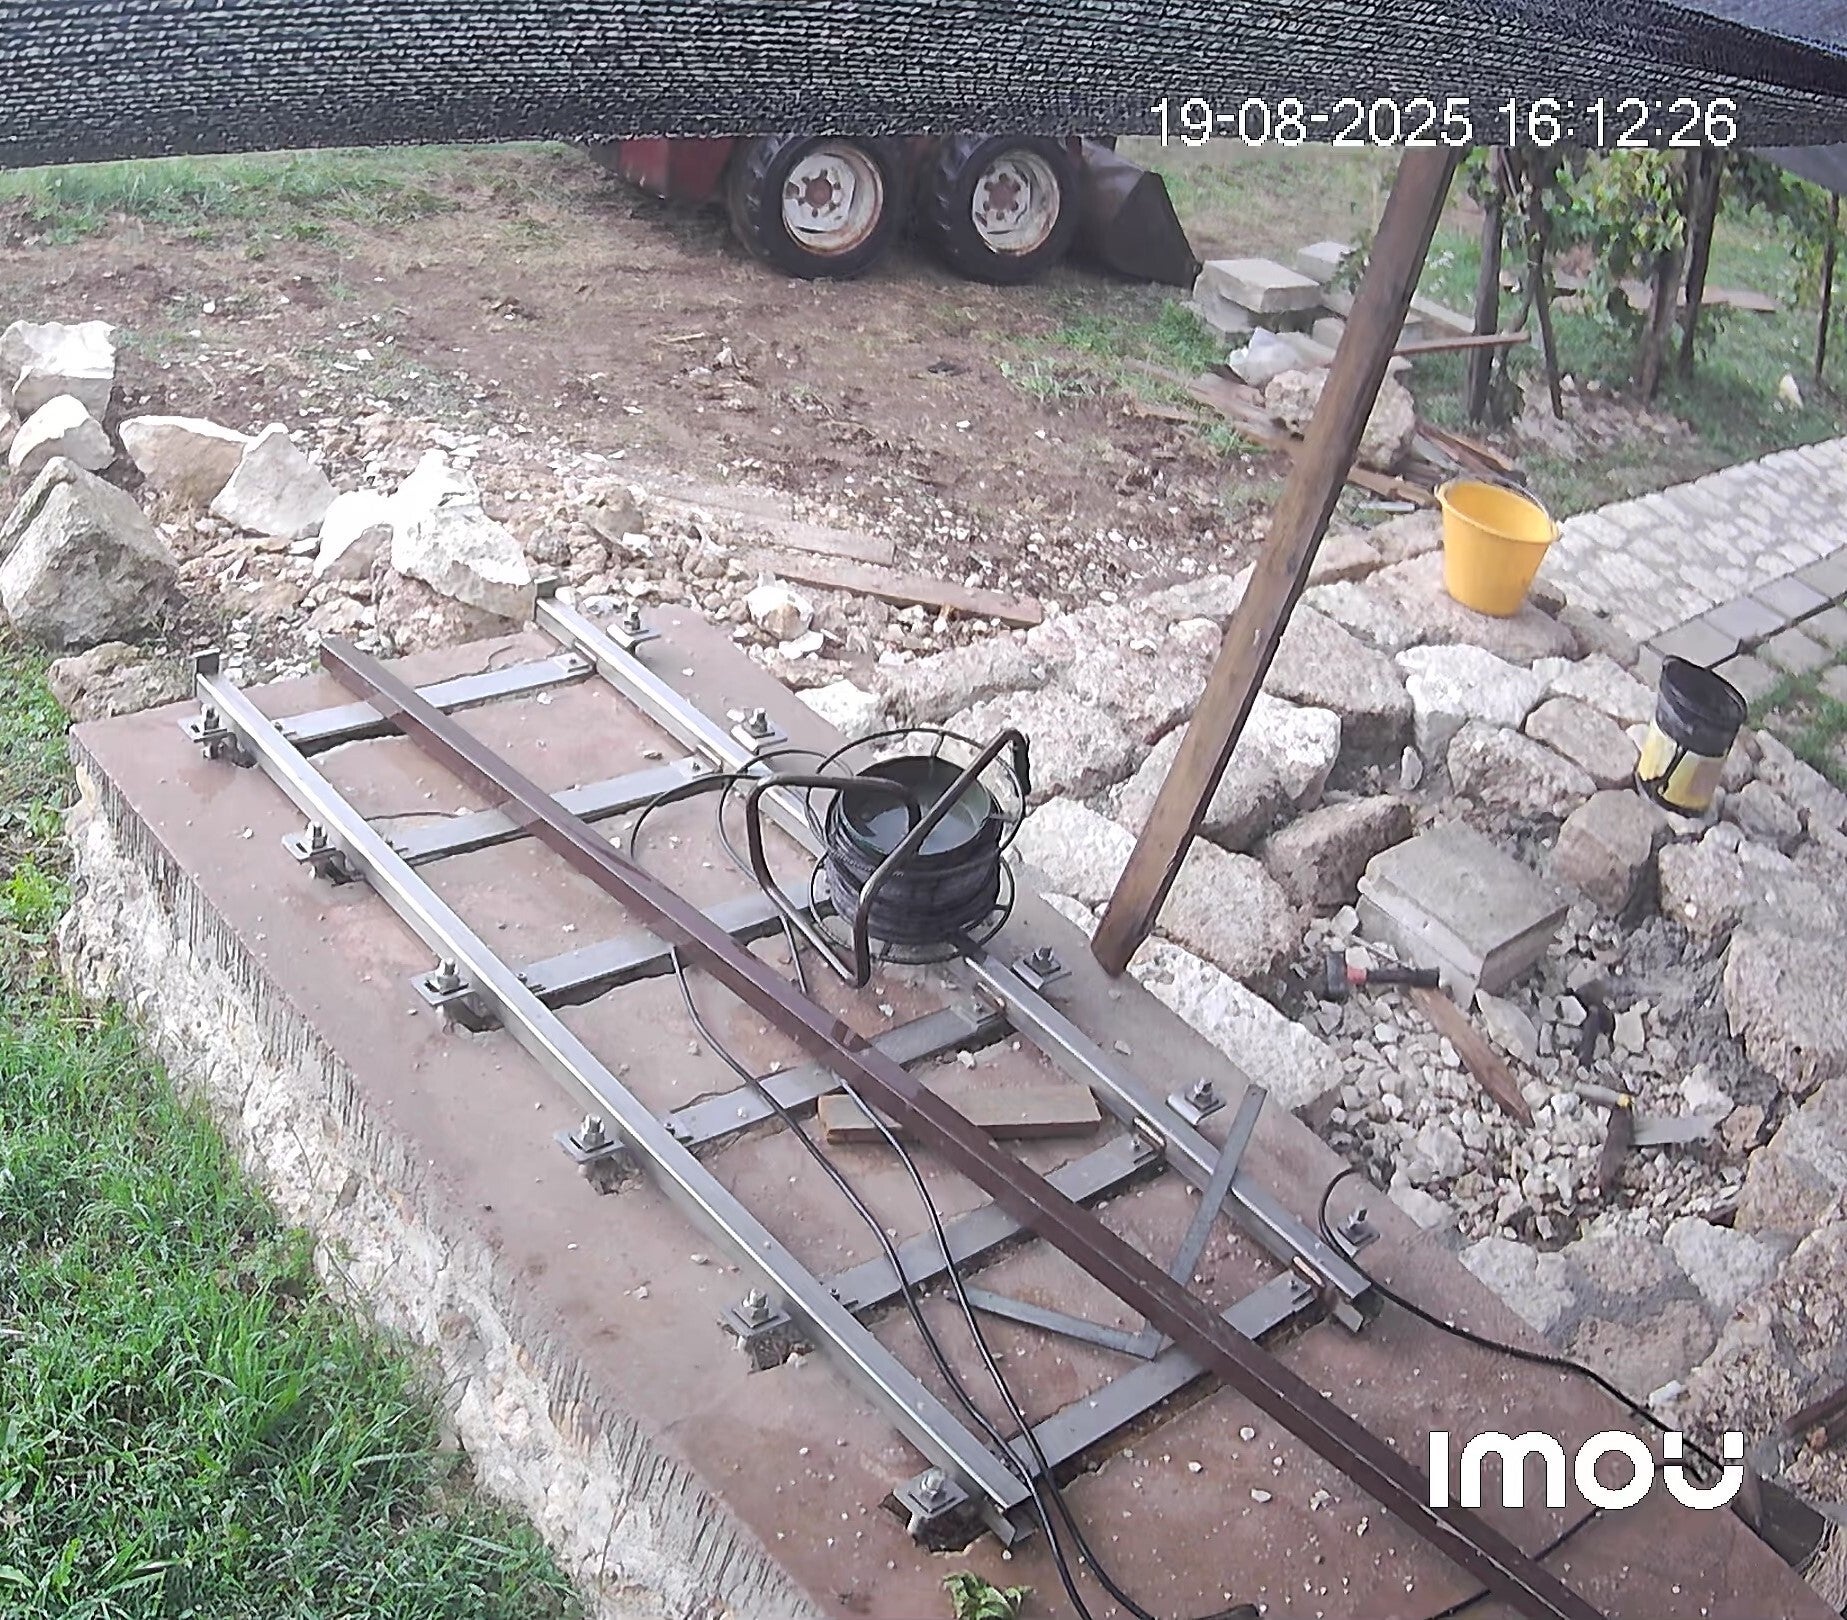
Trolley / Rail system
Entirely designed and built specifically for this purpose. It is a simple system but equally functional and effective. Four teflon wheels are coupled on rails made of square section steel profiles. The wheels have a profile similar to railway applications aimed at preventing derailment from the tracks. The wheels are fixed solidly to the 2 axles of the trolley that rotate on ball bearing hubs fixed on the lower part of the circular platform with a diameter of 90cm and thickness of 7mm. The entire system is made of stainless steel.

Trolley braking system
The rails have stops to block the trolley at the end of its travel, both internally and at the end of the external platform. This is for safety reasons and to avoid, for example, a collision with the internal column/telescope or external derailment. In addition, the trolley is equipped with 4 brakes made with steel pins that, when screwed onto the platform, push rubber clutches that push on the wheels, blocking them. This makes the system perfectly still and stable during observation or planetary imaging sessions. The photo also shows one of the two handles bolted under the base of the trolley that fits a special aluminum stick used to push the cart into or out of the observatory without touching the telescope that rests on them.

Dobson ready for use !
February 2025. One year from the start of the construction. Rolled out of the observatory on its convenient trolley on rails, the large Dobsonian telescope is finally ready for visual observation and planetary imaging. At the moment, a ladder well fixed to the ground will be used to reach the eyepiece, but soon we will have a raised platform designed for this purpose.
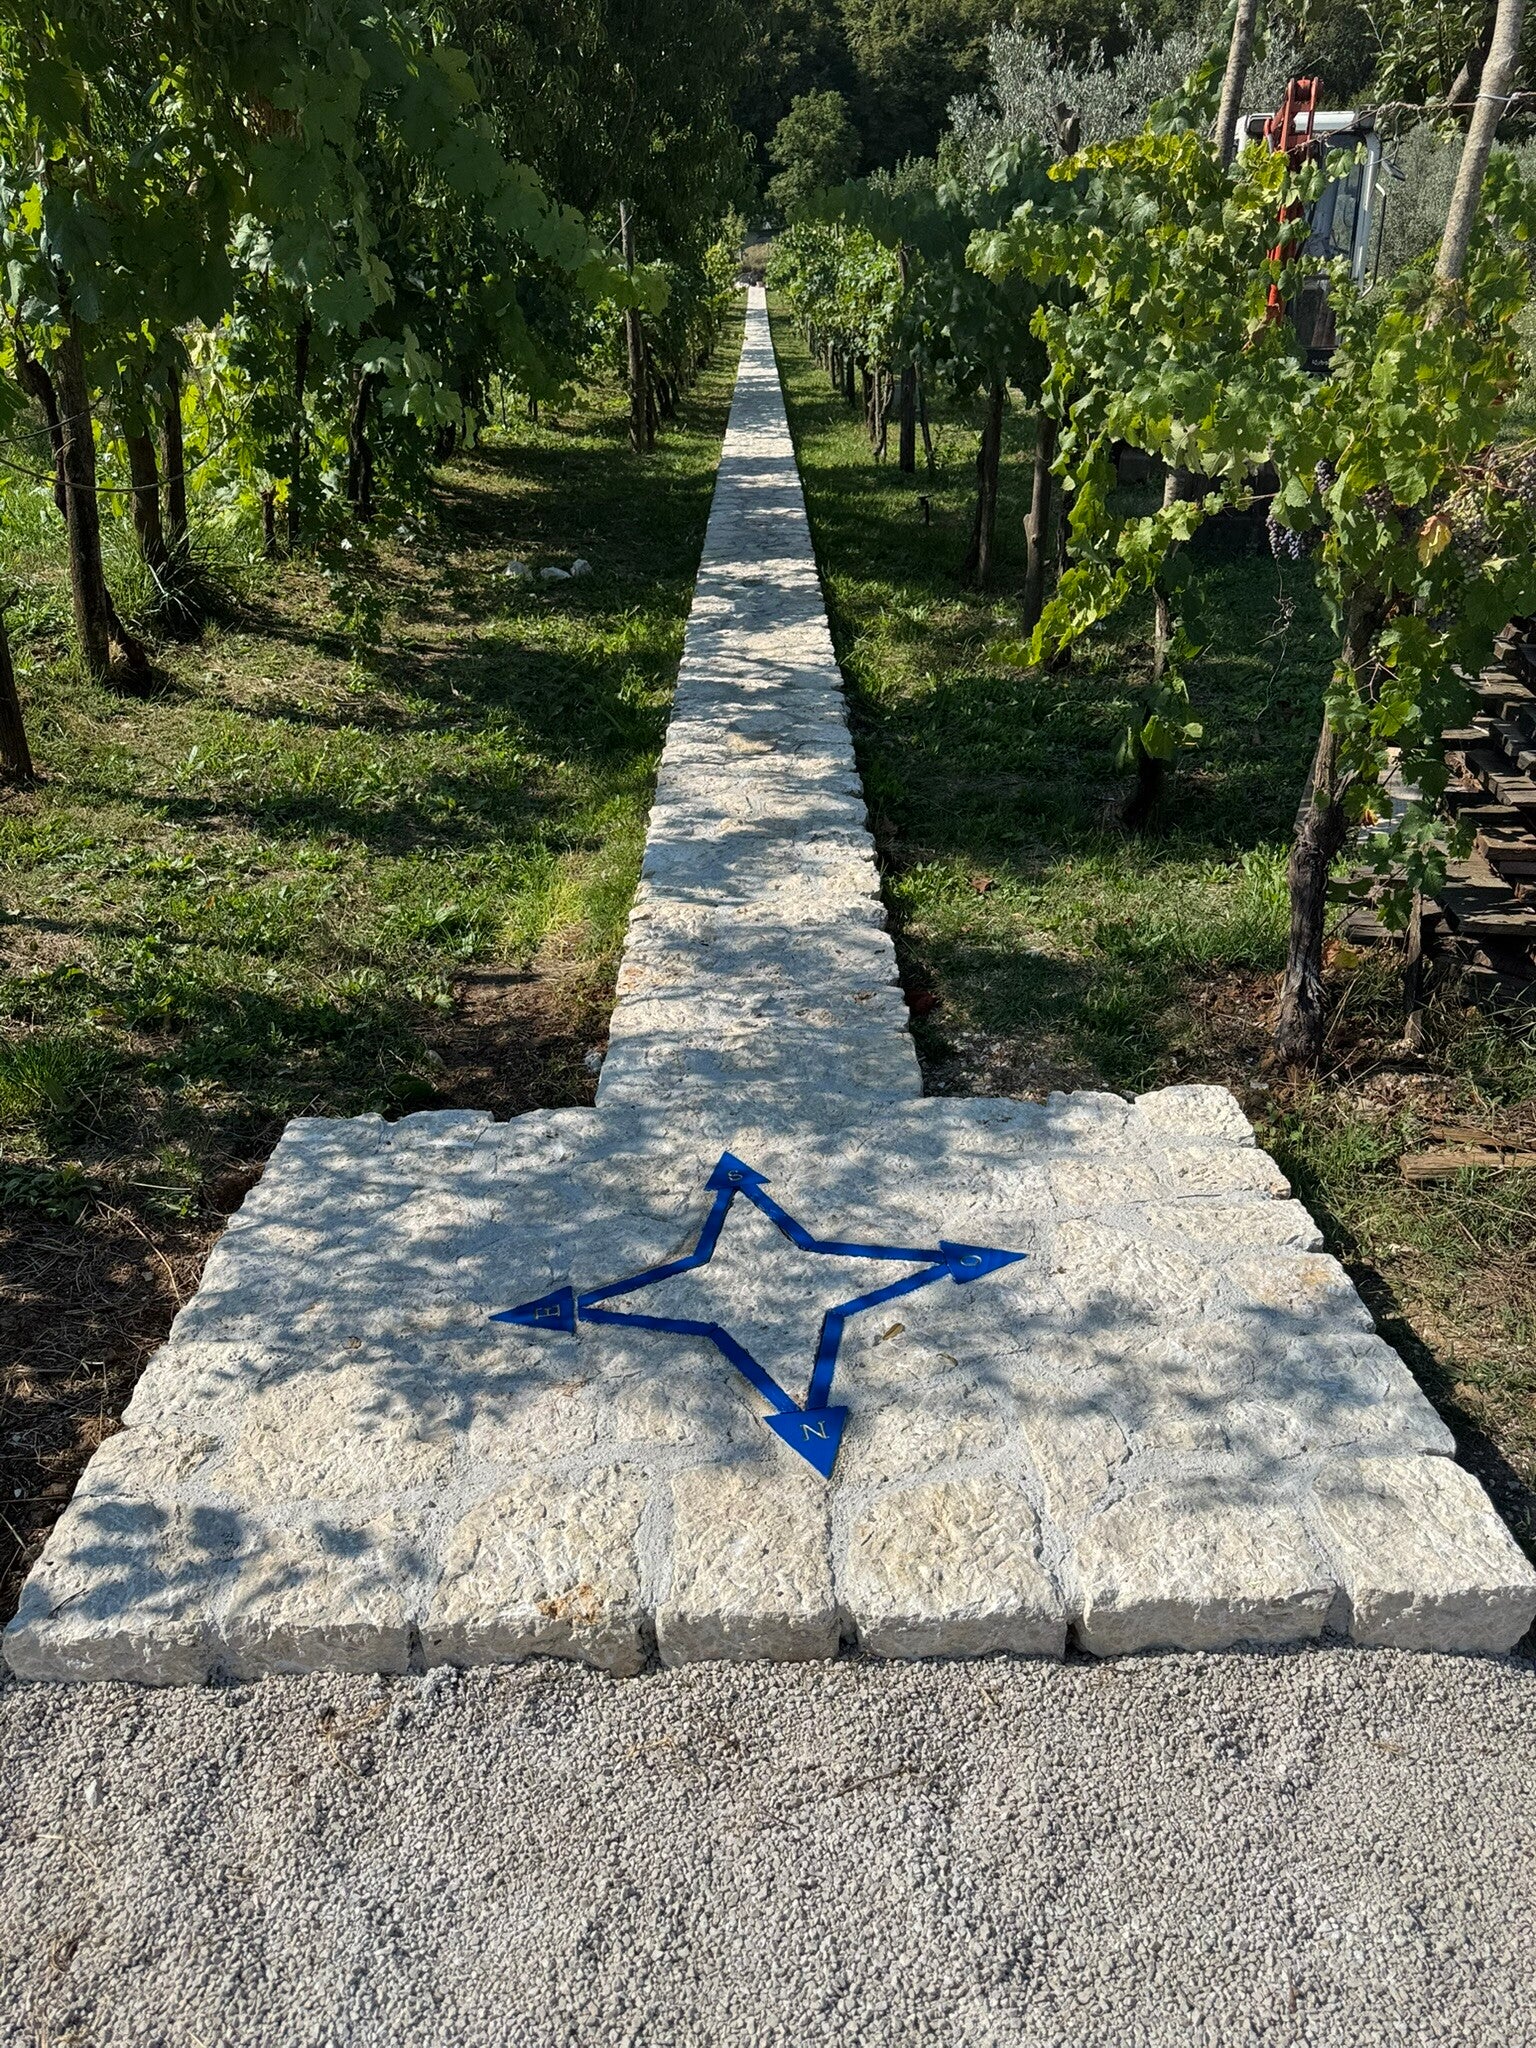
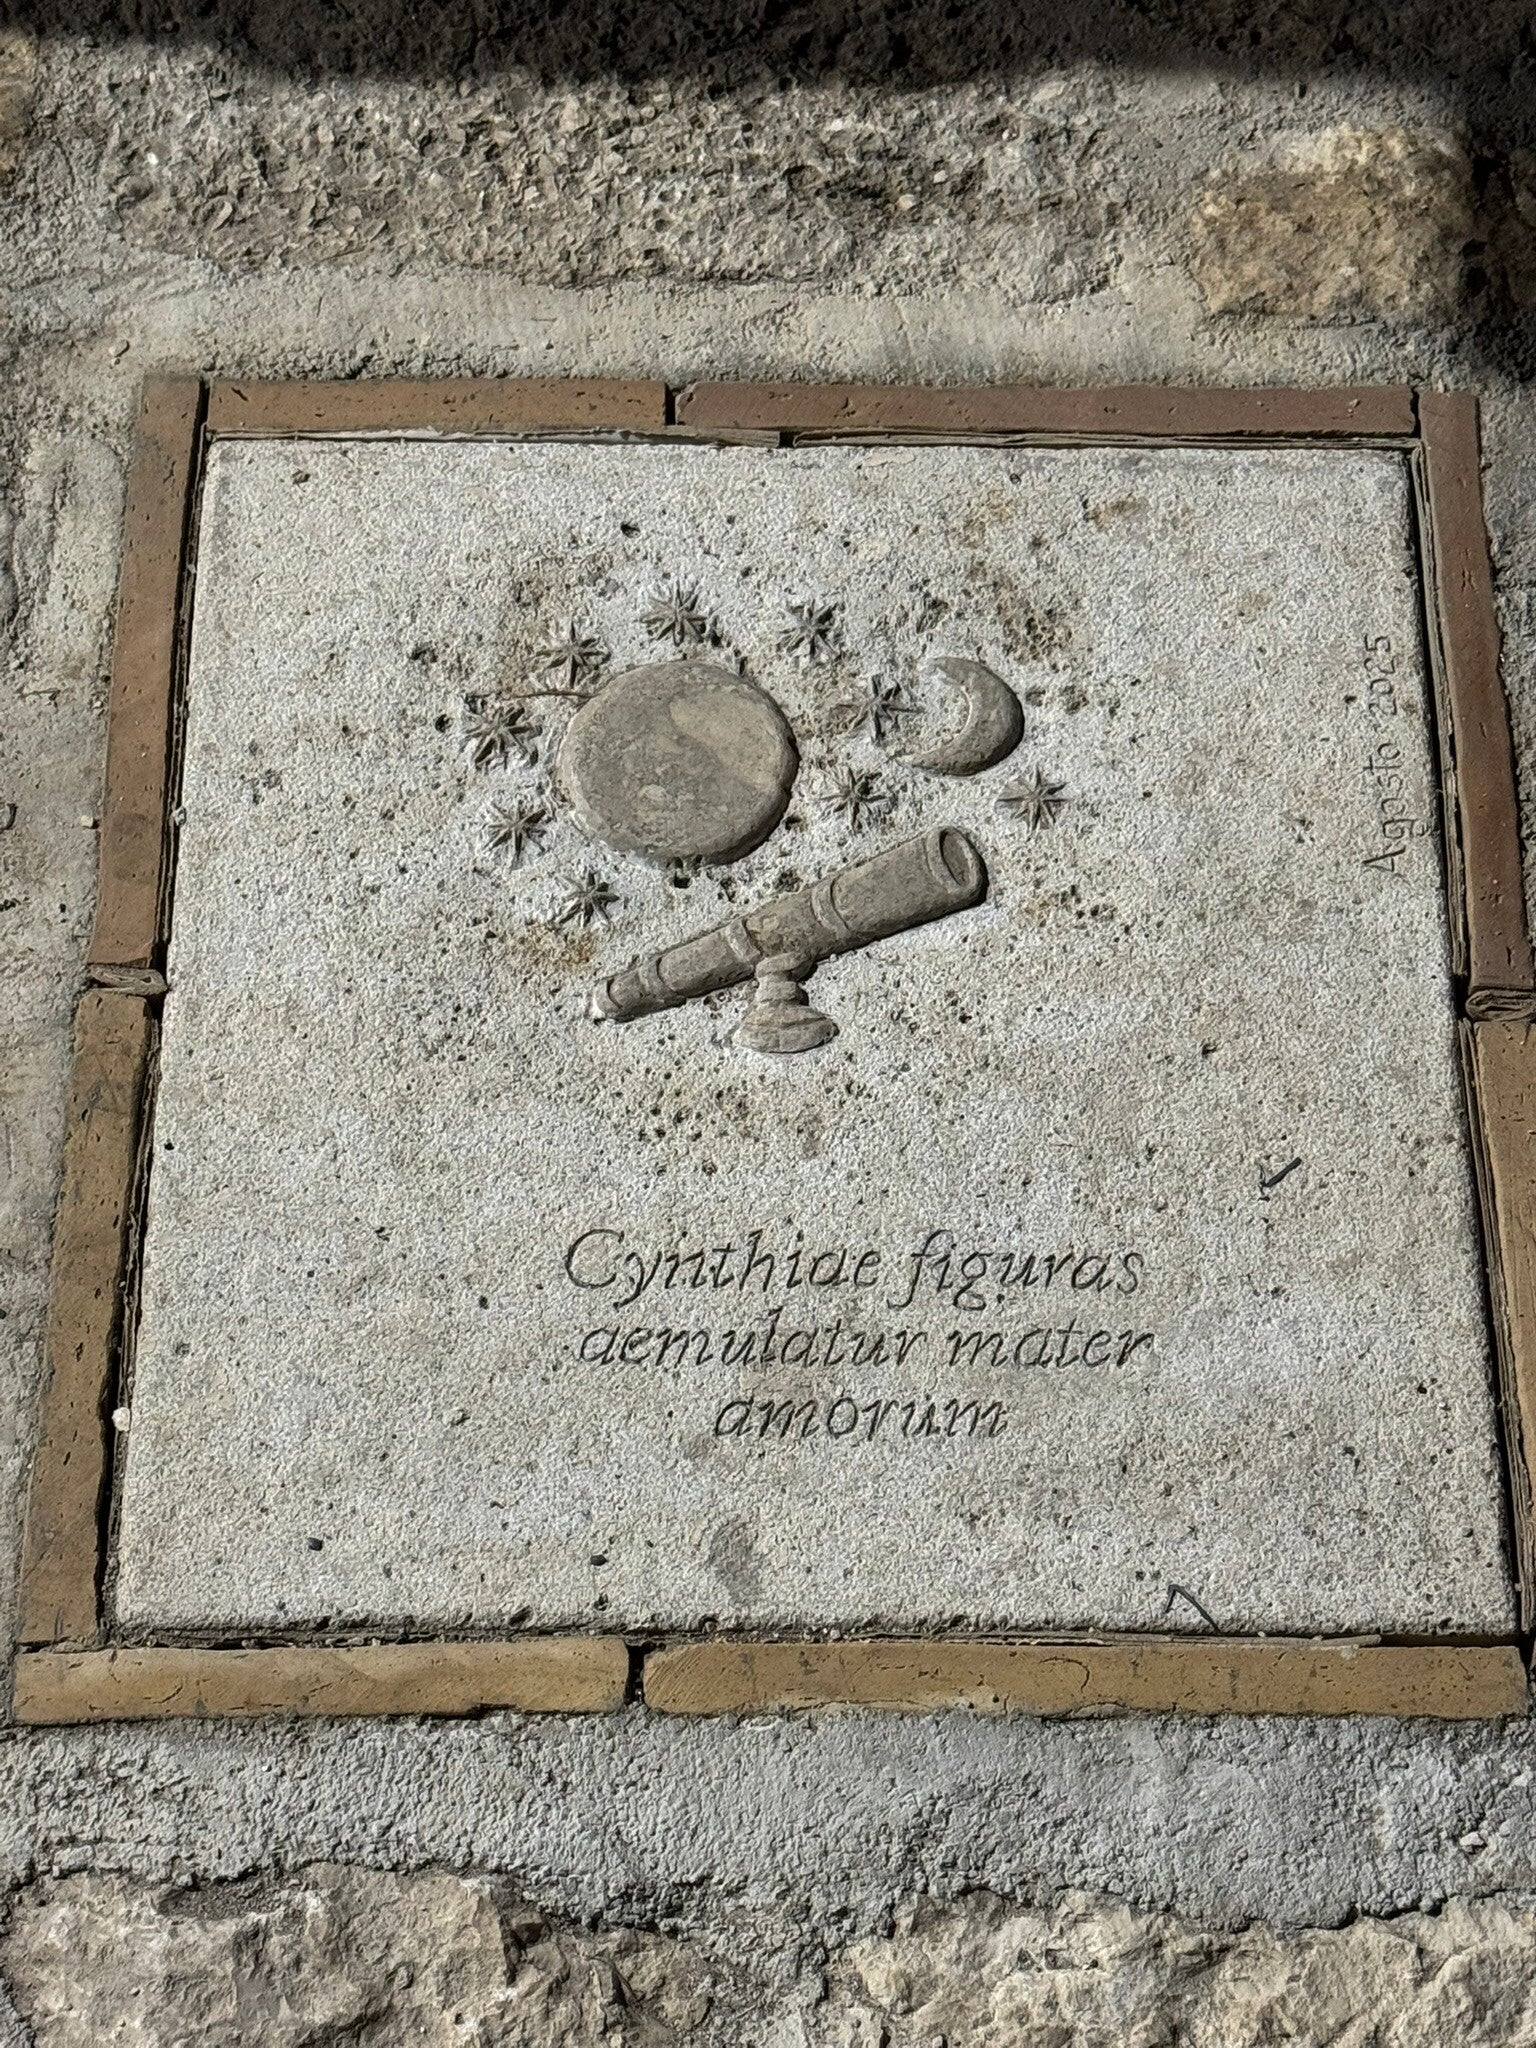
A beautiful stone path
A natural stone path almost 80m long is still under construction, leading from the country house to the Observatory. It is a path raised about 15cm above the ground avoiding any contact with grass and mud on rainy days. It passes between two wonderful rows of vines. The cardinal points are drawn on the small platform that marks the beginning of the natural stone path.
New natural stone flooring
A new natural stone floor was installed immediately next to the platform for extracting the Dobsonian telescope. The platform connects to the natural stone path that leads to the observatory from the country house.
Platform for using the Dobson telescope
Construction of a very strong and safe stainless steel structure with an alluminium pavement that allows easy access to the Dobson telescope eyepiece once it has been extracted from the observatory via the trolley on guides and positioned on the external platform.

The platform is almost finished!
The Dobsonian telescope fits inside a hole that allows for full movement. Obviously, some components of the platform (made of aluminum) are removable and therefore allow for the insertion of the Dobsonian.
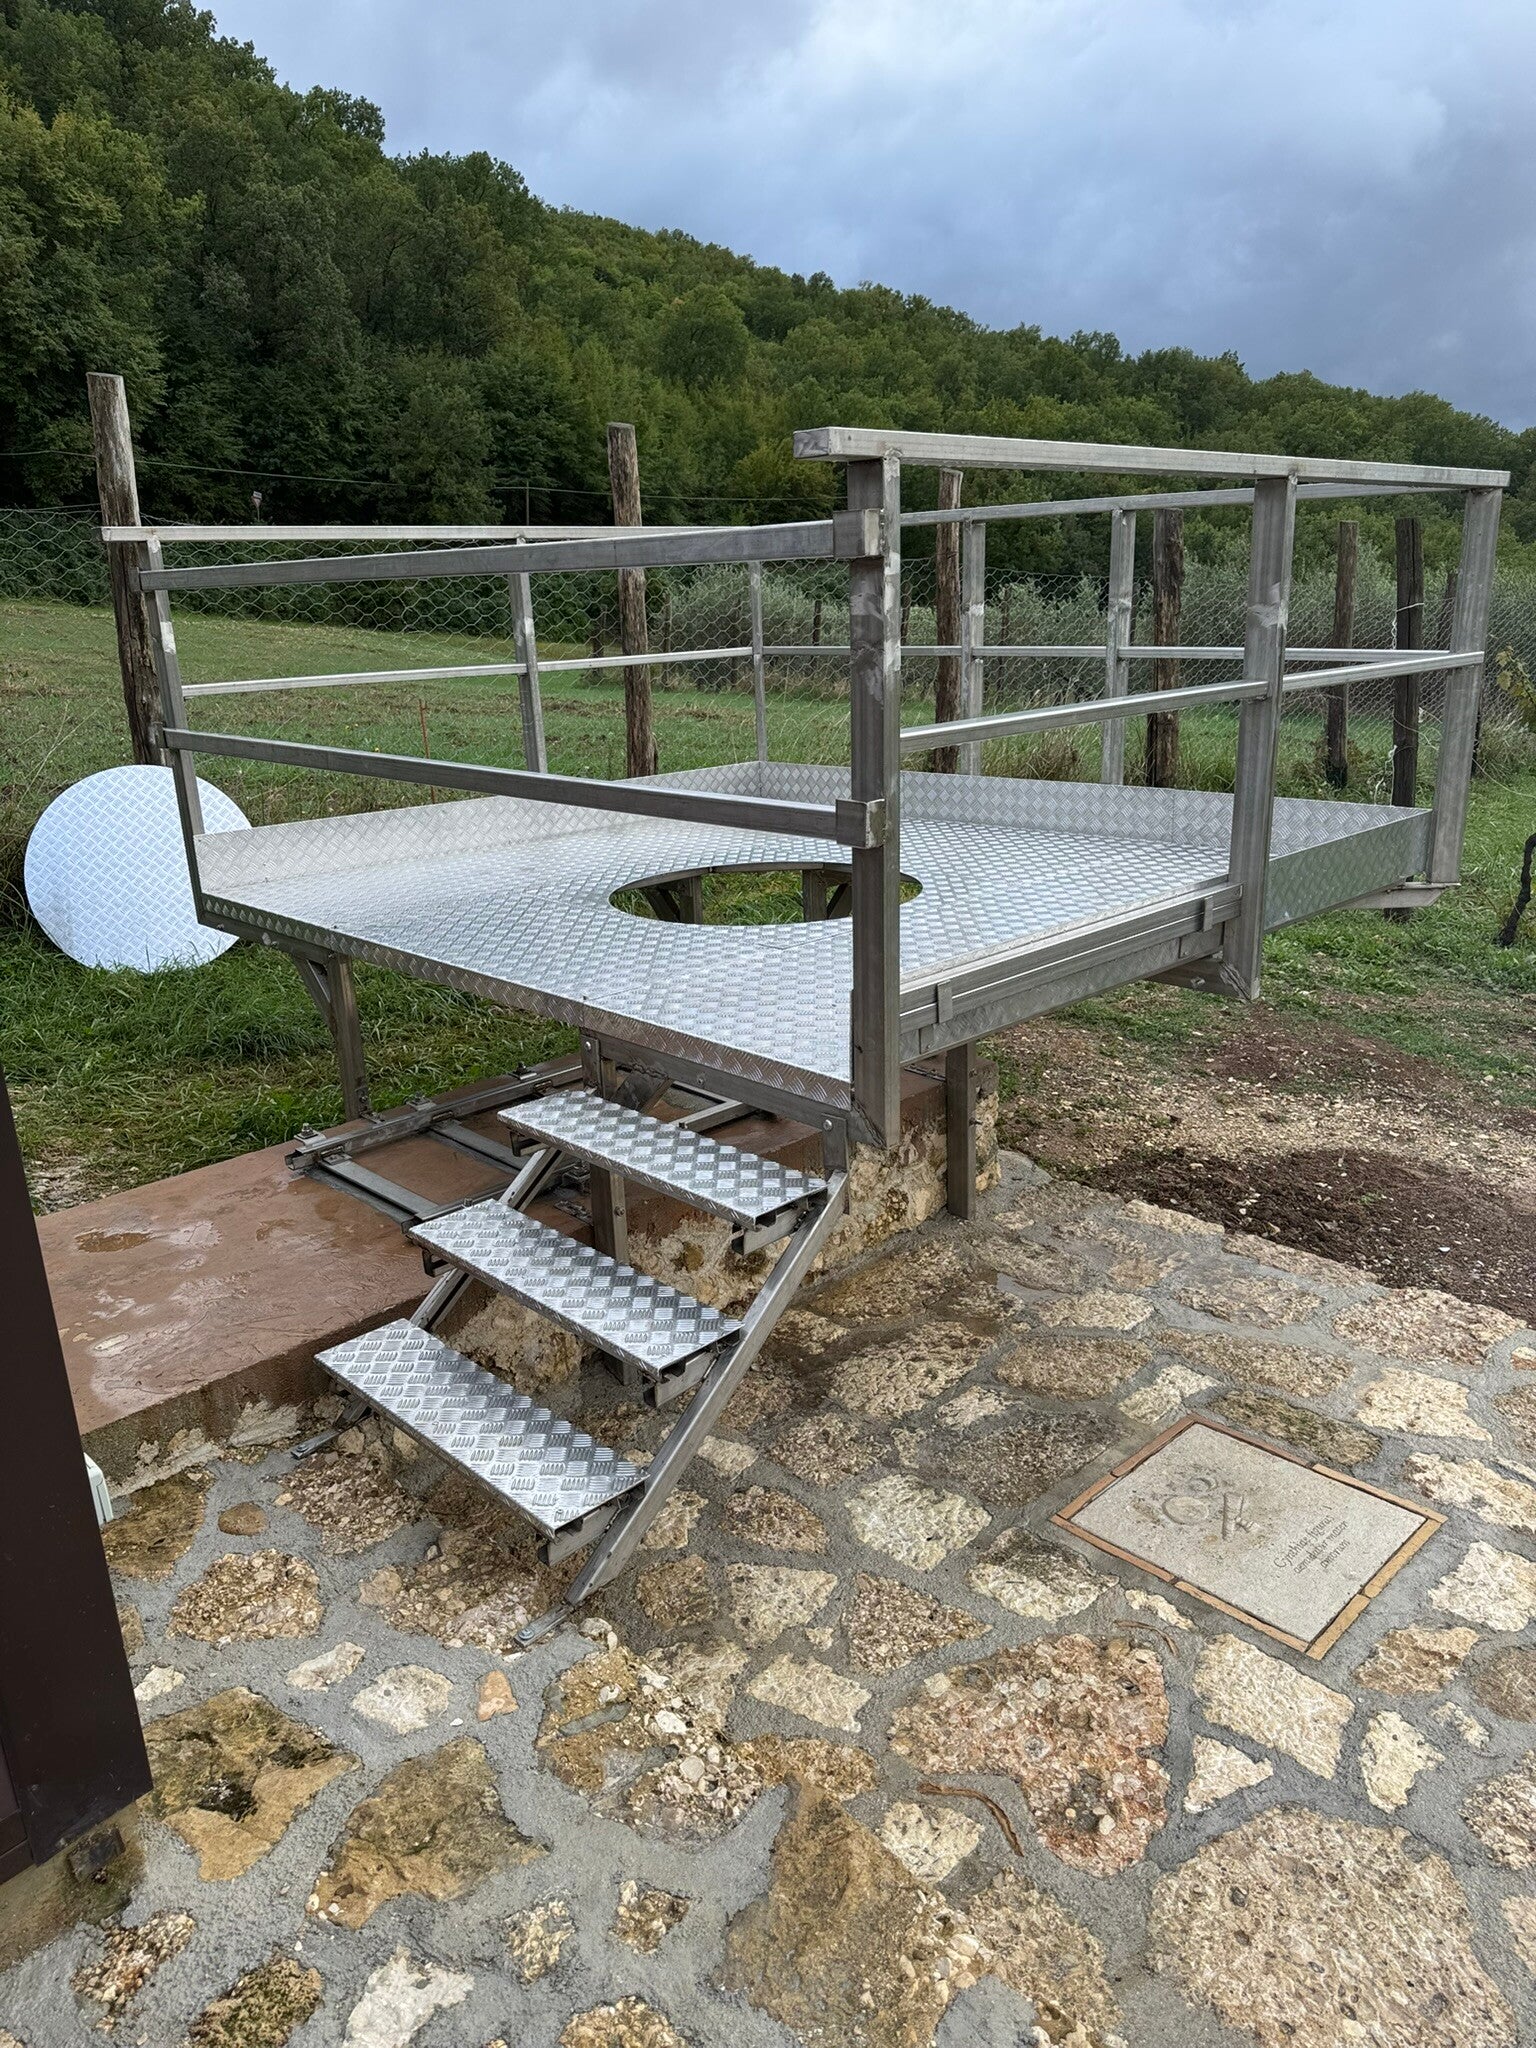
The platform is fully finished!
Now with the handrail on each side and the access ladder, the platform is ready for use!
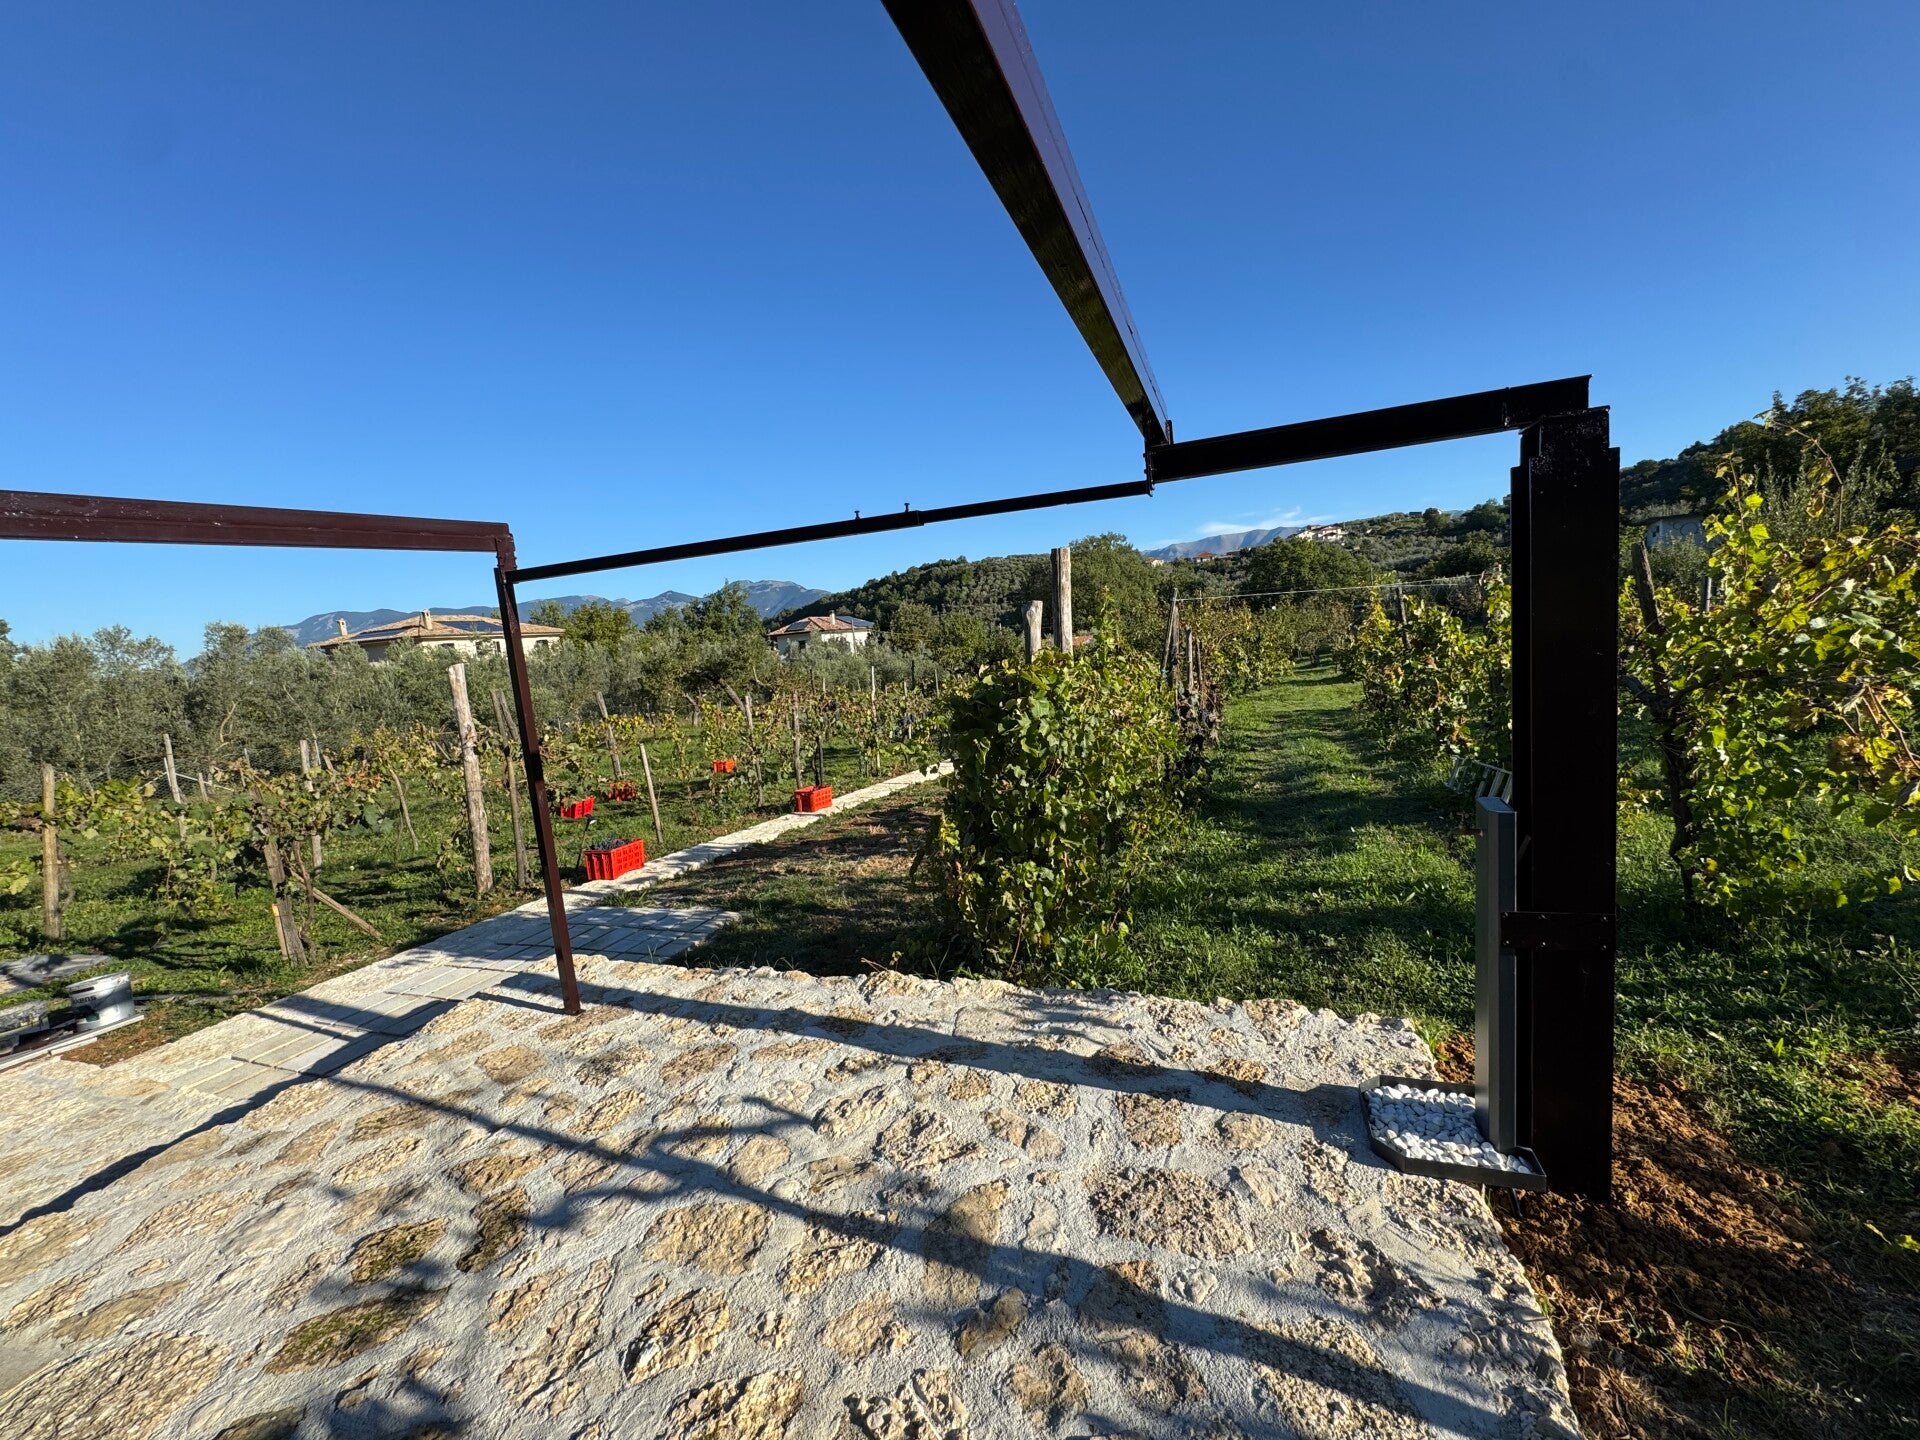
Reinforcement of the roof system
To minimize vibrations when the roof slides on its guides, a double T beam was inserted and immersed in half a meter of concrete. A beautiful fountain has been attached on it.